September 29, 2011

An Autumn Salad

I discovered this recipe a while ago and kept it tucked away. I honestly was intimidated. Some of the ingredients I hadn't ever used before. I've been intrigued lately by grain salads that I've had in restaurants and found them to be quite satisfying. This tucked away recipe continued to call for me to make it and so I did. The results were phenomenal.

Gorgeous bowl handmade by my beautiful niece

3 Grain Salad (click here for printable recipe)

Ingredients

Salad:
5 cups water
4 teaspoons vegetable-flavor instant bouillon
1/2 teaspoon salt
1 cup uncooked wheat berries, rinsed
1/3 cup uncooked medium pearl barley
1/3 cup uncooked regular long-grain brown rice
1 1/2 cups coarsely chopped unpeeled red apple (1 to 2 medium)
1/2 cup chopped red onion
1/2 cup raisins ( I used Craisins)
1/2 cup pecan halves, toasted, chopped

Dressing:
1/4 cup oil
1/4 cup cider vinegar
2 tablespoons honey
3/4 teaspoon grated ginger root

Directions

In 3-quart saucepan, bring water, bouillon and salt to a boil over medium-high heat. Add wheat berries; return to a boil. Reduce heat to low; cover and simmer 10 minutes. Add barley and rice; cook an additional 50 minutes or until all grains are tender. Drain.

In large serving bowl, combine wheat berry mixture, apple, onion and raisins; mix well.

In small bowl, combine all dressing ingredients; mix well.

Pour dressing over salad; toss to coat. Serve immediately, or cover and refrigerate 2 to 6 hours before serving. Just before serving, fold in pecans.

*Instant brown rice, can be substituted for the regular brown rice, add 1/3 cup instant brown rice 40 minutes after adding the barley.
*To toast pecan halves, spread on cookie sheet; bake at 350°F. for 5 to 7 minutes or until golden brown, stirring occasionally. Or spread pecan halves in thin layer in microwave-safe pie pan. Microwave on High for 4 to 7 minutes or until golden brown, stirring frequently.


Just in case you don't know much about Wheat Berries or Barley here are some photos to help you when you look for them. I found Barley by the rice and Wheat Berries located in the specialty health food section. I hope that helps!


September 27, 2011

Tidbit Tuesday (Halloween costumes)

Hello Friends! With Halloween fast approaching I thought I would share a statistic I recently read in Real Simple magazine that I found to be quite shocking. Have you ever thought about how many Halloween costumes get thrown away every year?
6,250 TONS
That's the amount of landfill waste that's accumulated from Halloween costumes. I would consider that something SCARY. I don't know about you but I want my children's children and beyond to enjoy life and if Mother Earth is being taken over by waste I'm not sure it will be so enjoyable. There is GOOD news because there is something we can do about it. Check out the website Green Halloween for lots of ideas. Did you know there is a National Costume Swap Day? It's October 8th! This sounds so much fun. There are events held all over the country where you can take your children to swap costumes and they can even try them on. I think there are also some online swap events taking place. Click HERE for more information. If you can't find one near you try throwing your own event in your community.

September 26, 2011

Perfectly Moist Chicken Fingers

This is a simple way to make chicken fingers. It's baked which makes it healthier but yet tastes as good as fried, if not better. When I introduced this to my husbands family they LOVED it :) I think they make it at least once a week. These Chicken Fingers are so moist you eat them with a fork. I hope you'll enjoy them as much as we do.


Honey-Mustard Chicken Fingers (click here for printable recipe)

Ingredients:

1/2 cup mayonnaise
2 Tablespoons Dijon mustard
2 Tablespoons honey
1 pound skinless chicken breast cut into 1-inch pieces (or just use already cut up chicken tenders)
1 cup cornflakes (crush these up in a Ziploc bag and add a little paprika)

Directions:

Heat oven to 400 degrees. In a medium bowl combine mayo, mustard and honey. Set half of the honey mustard aside. Prepare your chicken. Then dip the chicken into the honey mustard until evenly coated and roll in crushed corn flakes. Bake for 12 minutes or until chicken is no longer pink. Serve with Honey Mustard.


The steps are as easy as 1, 2, 3


September 23, 2011

Happy 1st Day of Autumn

Do you prefer the word Autumn or Fall? When I taught a classroom full of students who were still learning the English language I found out quickly how confusing some words can be. Think of how many different ways you can use the word fall. I think I prefer Autumn since it has only one meaning.  Besides I find it to sound much more beautiful.


 I'm always excited when this time of year rolls around because acorns and squirrels can often be found in abundance, while during other seasons you hardly see them at all. In my house there are touches of Autumn that can be found year round. I adore all things squirrely! I recently found a metal acorn basket that is filled with fall scented gourds and pine cones. I'm excited that I can I can open it and fill it with other interesting things.


Below is a picture of my baby girl Blanca and next to her is my Friendship Squirrel. It was a gift from my wonderful sister-in-law. This is the first thing that we put out when we move to a new place and it always sits in the window to welcome visitors.


I even have a squirrel sitting on top of my bookcase. He's a beautiful squirrel made of tin. 


Is there something that you adore that's displayed throughout your house?

I will leave you with a memory of Autumn in Colorado. A picture of gorgeous Aspen trees that's leaves are turning a brilliant golden. If you have never seen the Rockies during this season I recommend it!


I couldn't choose just one picture :)

September 22, 2011

Blueberry Cream Cheese Mini Pies

When the Dough Boy popped up in my inbox with this recipe I knew that I had to try it. This reminded me of the thing I crave most from Bojangles, the BO-BERRY BISCUIT. Bojangles if you don't know what that is I'm sorry. It's a must try Southern fast food chain, you really haven't lived until you've tried it. They are famous for Chicken on a Biscuit, to die for Fixin's, GLORIOUS fried sweet potato pies and sinfully good SWEET tea. Anyway this recipe is the closest thing I've had to a Bo-Berry in a long time. I was quite flattered when my husband tried it and said he actually thought it was better than a Bo-Berry. Check out the recipe and the mouth watering pictures below.


Blueberry Cream Cheese Mini Pies (click here for printable recipe)


Ingredients:

Streusel
6 tablespoons all-purpose flour
1/4 cup sugar
1 tablespoon grated lemon peel
1/4 cup cold butter or margarine

Blueberry Filling
3/4 cup sugar
3 tablespoons cornstarch
1 cup water
4 cups fresh or frozen blueberries
1 teaspoon grated lemon peel
1 tablespoon fresh lemon juice

Cream Cheese Filling
1 package (8 oz) cream cheese, softened
1/4 cup sugar
1 egg

Crust
1 can (16.3 oz) Pillsbury Grands! Flaky Layers refrigerated biscuits

Directions:

Ice cream scoops are great tools
1.)   Heat oven to 350°F. In medium bowl, mix flour, 1/4 cup sugar and 1 tablespoon lemon peel. Cut in butter, using pastry blender (a fork worked great for me), until mixture looks like coarse crumbs. Set aside.                   

2.)   In 2-quart saucepan, mix 3/4 cup sugar and the cornstarch. Gradually stir in water. Cook and stir over medium heat about 10 minutes or until thickened. Add 1 1/2 cups of the blueberries. Reduce heat to low. Cover; cook about 10 minutes or until mixture returns to a boil. Stir in 1 teaspoon lemon peel and 1 tablespoon lemon juice. Add remaining blueberries; stir gently. Set aside.
3.)  In small bowl, beat cream cheese filling ingredients until smooth; set aside.

4.)  Separate dough into 8 biscuits. Split each biscuit in half to make 16 rounds. With floured fingers, flatten each to form 4-inch round. Press 1 biscuit round into each of 16 ungreased regular-size muffin cups. Spoon 1 tablespoon cream cheese filling and 2 tablespoons blueberry filling into each biscuit-lined cup. Sprinkle each with about 1 tablespoon streusel (cups will be full).          
         
5.)  Bake 18 to 22 minutes or until golden brown. Cool 5 minutes. Remove from muffin cups to cooling rack. Cool 10 minutes before serving.


I won't lie they made a mess, but it was so worth it. Surprisingly even though there was a mess they came out of the muffin tins easily and set up really well. They weren't messy to eat. One night we warmed them for 30 seconds in the microwave and put a scoop of vanilla ice cream over top. Okay we didn't just do that one night, maybe a couple nights. It was SO good!

September 20, 2011

Tidbit Tuesday (brown sugar)

Have you ever gone to get some brown sugar and realized that it was hard as a rock?  I have and unfortunately I thought that it was not good to use anymore and I would just get rid of it.  The reason why it gets hard is because the moisture inside of it evaporates over time. So that means all that's necessary to get soft brown sugar is to re-moisturize it.

My hard brown sugar problems were solved when I got an adorable Brown Sugar Bear to live inside my brown sugar container and emit just the right amount of moister. If you don't have a Brown Sugar Bear there is still HOPE. You can re-moisturize your brown sugar by placing it in the microwave with a cup of water next to it and zapping it for 3 minutes. Make sure your brown sugar is in a microwave safe dish or bag. Apparently you can also place the sugar in a bowl and cover it with two wet paper towels and then with foil and let it sit overnight. P.S. you can use the Brown Sugar Bear to keep anything that you want moist! You could put it in a bag of marshmallows or lay it next to homemade muffins.

I took a picture of my adorable Brown Sugar Bear in case you've never seen one before. I also found a website that sells not only Bears but other cute shapes. That's when I realized what these magical little things were. It's just clay! I'm going to start experimenting in the pottery studio and see if I can make some cute squirrel or acorn shaped ones. Stay tuned, I'll let you know if it works.

Click the picture to go to the website that sells this cutie

September 19, 2011

Plates and Mugs

I feel so thankful that I have the opportunity to throw pottery again. I've been practicing and working really hard. Compared to the pieces I made in college I feel like I've improved drastically. I even threw my first plates. I was so excited about these plates! If you don't know plates are very challenging to throw and get through the firing process without getting an S crack down the middle.


I've been feeling so good about my pottery lately until I met a wonderful man by the name of Henry at the pottery studio who, in a very kind way, told me I've been doing everything ALL wrong. Normally I would have been heart broken at someone criticizing and correcting me but somehow this has brought me so much joy. I feel like Henry was heaven sent and that I have a personal teacher. He's not afraid to yell at me from across the room, cut my pots in half, or grab my hands and say "like this".  And I suppose that's just what I needed.

Henry is a retired ceramics professor and has a wealth of knowledge. He's teaching me how to be an efficient and smart potter so that I can continue doing what I love until I'm his age. Throwing pottery can be very hard on the body especially if you work harder than you need to, like I've apparently been doing.

According to him I need to work with much softer clay, use much less water and make a hundred of the same exact thing in a row. And that's just the tip of the ice burg. I snuck these two plates and mugs out of the studio without him seeing them. I couldn't deal with him telling me to get rid of them. Even though its hard sometimes I know he's pushing me to be better. When I'm forced to make the same boring cylinder over and over just to cut it in half and see if it's even consistency I remember something Eleanor Roosevelt said, "Do what you feel in your heart to be right. You'll be criticized anyway." That's exactly why I kept the plates and mugs because in my heart I'm proud that I made them and I'm sure if it's not Henry it will be someone else who will criticize them.

Do something today that makes you happy and don't worry so much about what others will think or say.


September 16, 2011

A Knife for Crafting


Did you notice the knife in the picture on yesterday's blog? That's my special crafting knife! My husband gave it to me when he was my boyfriend and we were dating in college. On Valentine's Day he gave me a gift bag filled to the top with Hershey Kisses. I'm sure I gave him some kind of face considering I wasn't that big of a fan of Hershey Kisses and there was no way one person would ever need that many. Little did I know there was something hidden in the middle of those chocolates. A KISS knife! And I thought the chocolates were weird...

He had to explain his thinking of course. He knew how much I enjoyed creating things and I had recently started a pottery class. I "borrowed" one of his man knives to assist me in slicing and recreating some of my clay pieces. His knife made a great tool in the pottery studio and I never really gave it back. I'm not sure he wanted it back anyway considering it was caked with clay.

That's when he got the idea to get me my very own knife I could do whatever I want with. How funny that it's a KISS knife named the PECK. Although these are cute names they do have a meaning,  KISS stands for Keep It Super Simple and PECK stands for Precision Engineered Knife. I use my KISS knife regularly, usually for paper crafts. After all I have a perfectly good knife for the studio. When I started throwing pottery again I was excited to open up my ceramic tool box and find my husbands knife still caked in clay.

That little KISS knife means more to me now than I ever thought it would at the time I received it. It's a memory of a thoughtful friend and a deep lasting love. I'm so thankful for my husband!

September 15, 2011

Give Yogurt Containers a New Life

Yogurt containers are so easy to reuse in a variety of ways. As a teacher they came in very handy, especially the big ones. My favorite way to use them was to organize supplies. My students desks were arranged into pods and each group would have their own yogurt container where they would keep shared materials.  There would be other containers scattered throughout the room. One for sharp pencils and one for dull. A container for scissors and one for dry erase markers. The small yogurt containers work great for crayons. I thought it was important to teach my students how to re-purpose things. It was also important for me to create a comfortable and warm environment for my students since they spend so much time at school. So we didn't just use the yogurt containers as is, we turned them into beautiful works of art.

These are some containers that my students re-purposed.
 They loved being a part of creating the classroom atmosphere, it gave them ownership.

You don't have to have a classroom to do this with yogurt containers. I'm sure you have all kinds of supplies around your house that could use some fun storage.

Here are the materials you need for this project:
  • Mod Podge (I prefer matte, gloss tends to reflect flaws)
  • Clean yogurt container
  • Paint brush
  • Paper (scraps of paper work great, so does fabric)
  • Knife or Scissors
  • Water
  • Ruler


The steps are simple


First measure the yogurt container so that you know what size to cut your paper.  Next cut out sections of paper according to the measurements. Third brush Mod Podge onto the back of the paper. Then adhere paper to container and continue with each section of paper until the entire container is covered. Lastly paint over everything with a thin layer of Mod Podge. Don't be afraid to layer the paper it just adds an artistic quality. We aren't going for perfect here.

I added a little ribbon to the top of this one with some hot glue. The Mod Podge dries in just a few hours so this project is pretty fast.  I hope this idea will inspire you to save some yogurt containers and re-purpose them. Have fun with it!


September 14, 2011

Make your own Taco Salad Bowls

It's so easy to make your own bowl for Taco Salad and it's pretty impressive to guests. I personally think that these bowls taste better than ones you can buy already made. They bubble up and get crunchy but not too crunchy.


Here's what you need to make your own Taco Salad Bowls (Click here for printable recipe)
  • An empty can (you can use a can of black beans or kidney beans to add to your salad so just use that one)
  • 3-quart saucepan (one that's a little smaller in diameter than your flour tortillas)
  • Vegetable Oil
  • 10 inch Flour Tortillas (as many as you need)
Directions:

1.) Make sure the label is completely off your empty can and wash and dry it thoroughly. Once you do this you never have to do it again. I just keep my can on the shelf with my pots.

Photobucket2.) In the saucepan heat about 1 1/2 inches of oil to 375 degrees. Not sure how to tell if your oil is ready? You can use a thermometer or it's even easier to test the oil with the bottom of a wooden spoon. You just place the wood spoon in the hot oil and if it bubbles then it's ready! You can also use wooden chopsticks like in the picture.


3.) Place 1 tortilla on top of the oil in the saucepan. Holding can with long-handled tongs, place can on center of tortilla. Push tortilla into oil by gently pushing the can down.


4.) Fry tortilla with the can for about 5 seconds or until set. Remove can with tongs. Fry the tortilla 1 to 2 minutes longer, turning it in oil until it's crisp and golden brown.


5.) Carefully remove tortilla from oil and drain excess oil from the inside. Turn tortilla shell upside down on paper towels to cool.

6.) Repeat with remaining tortillas.

You can add anything you like to a Taco Salad. There are so many varieties. Some have chicken, some have ground beef and others have no meat at all. What are your favorite ingredients for a Taco Salad?

Here are the ingredients I use to make Taco Salad:
  • 3/4 cup Thousand Island Dressing (I'll share my favorite recipe below)
  • 1 lb lean ground beef
  • 2/3 cup water
  • 1 Tablespoon chili powder
  • 1/2 teaspoon salt
  • 1/4 teaspoon garlic powder
  • 1/4 teaspoon cayenne pepper (add more if you like it HOT)
  • 1 can black or kidney beans drained
  • 1 medium head of lettuce torn into bite size pieces
  • Shredded Cheddar cheese
  • 2/3 cup sliced olives
  • 2 medium tomatoes chopped
  • 1 ripe avocado, pitted, peeled and sliced
  • green onions, sliced
Directions:

1.) Make Tortilla shells and Thousand Island Dressing.

2.) In a skillet cook beef over medium heat until browned. Then drain fat and add water. Next stir in all seasonings and beans. Heat to boiling, reduce heat and simmer uncovered for 15 minutes stirring occasionally. Cool for 10 minutes.

3.) Add lettuce to tortilla bowls top with all other ingredients. Pour dressing over top and garnish with avocado.


I couldn't decide which picture to add. I liked them both but I forgot the cheese on this one. Which picture do you like better?
Here's what you need to make my FAVORITE Thousand Island Dressing:
  • 1 cup mayonnaise
  • 1 Tablespoon chopped fresh parsley
  • 2 Tablespoons  chopped pimiento-stuffed olives or sweet pickle relish
  • 2 Tablespoons chili sauce or ketchup
  • 1 teaspoon finely chopped onion ( I usually use my small grater for this)
  • 1/2 teaspoon paprika
  • 1 hard-boiled egg finely chopped (the grater works for this too)
Directions:
In a small bowl, mix all ingredients. Store tightly covered in refrigerator.


How LUCKY are you to have read my blog today and get 3 recipes in 1 post! I hope I've inspired you to get in the kitchen and make a Taco Salad, it really is a lot of fun to make your own bowl. I would love to know if you try it!

    September 13, 2011

    Fried Pimento Cheese Video

    I adore Pimento Cheese and I think I'm going to have to try this!

    Tidbit Tuesday (dryer sheets)

    Did you know that dryer sheets can be quite handy? They work wonders on pots and pans with baked on food. You just need to fill the pot or pan with water and let the dryer sheet soak for a while. Then use the dryer sheet and give it a good scrub.

    Dryer sheets are not only helpful in the kitchen but they work amazing in the bathroom too. Dryer sheets are great for cleaning the scum off the walls of your shower. It really works! Do you have any interesting uses for dryer sheets?

    September 9, 2011

    Italian Measuring Jug

    The other day when I found my new journal this gorgeous recycled glass measuring jug caught my eye. I thought it was so unique and I was excited when I flipped it over and saw that it was made in Italy. I've been needing another measuring cup and I really like that this one was not only practical but attractive. It's something I can leave out. Can you believe it has 6 sides! How fun is that? Each side is labeled with one of the following:  flour, sugar, rice, fluid ounces, cups, and milliliters. It has a spout too! This jug holds 26 ounces and not only is perfect for measuring things but keeping herbs fresh. I filled it with water then added parsley. It makes a beautiful kitchen vase. I looked it up online and if you really like it you can get one here.


    Pin It

    September 8, 2011

    A new little Red Journal

    I was at TJ Maxx the other day with list in hand and of course I found a couple things that I couldn't resist and that weren't exactly on my list. There's something about the thrill of the hunt and of course a good deal. I can hardly ever go in TJ Maxx without looking in the kitchen section and the stationary/book section. The stationary/book section is always exciting because there are rows of books, packs of pretty paper, cards and other random doodads stacked in a wonderful disorder. I personally ENJOY the disorder! I really like to get in there and find the jewel that's hiding the furthest back on the very bottom. I walked away from the store with a beautiful red leather bound journal. I thought it was very fitting considering the front was decorated with the words CREATE. I've been meaning for some time now to consolidate all my ideas into one place that's clearly identifiable. Tomorrow I'll have to share the beauty that I found in the kitchen section, I have a feeling that you will love it as much as I do.


    September 7, 2011

    Hot Dogs


    What's your favorite way to eat a hot dog? I think mine has to be with onion, mustard, chili and slaw. My husband calls it Carolina Style. Sometimes when we're in a hurry we use canned chili but that usually results in disappointment. It really is easy to make a quick chili for hot dogs or if you have a distinguished palate pour it over top of some fries. Some people even use it for Sloppy Joes.

    Here's what you need:                                                                                      
                                                            
    1 pound of hamburger meat
    1 cup ketchup
    1 teaspoon vinegar                                                             
    1 tablespoon chili powder
    1/2 teaspoon salt
    add a little Cayenne pepper if you like heat
    1/2 cup water

    Directions:

    1.) brown hamburger and drain fat
    2.) add remaining ingredients to beef and simmer until heated through

    September 6, 2011

    Tidbit Tuesday (white clothes)

    creation labor basic summer celebrate labor

    I hope you all had a  Lovely Labor Day yesterday! I decided that today's tidbit should have something to do with Labor Day. I find it fascinating that every year this holiday rolls around there is another great debate about the color white. It must just give people something to talk about because I find it to be quite silly talk.

    Apparently Labor Day marks the last official day of summer and the last day that white should be worn. This tradition actually started for many reasons the main one being practicality. Before modern cooling devices were invented during the summer months people would often wear white to keep themselves cooler. When fall and winter come along the weather changes and things usually get wet and muddy. It's not really considered the ideal time to wear a big white long sleeve dress.

    Sure with today's fashion you could pull off some white. I would say that white tops would be easier to pull off then shoes or pants. The point is that it's not about "fashion" its about being PRACTICAL. When is the last time you heard a debate about what kind of hat men should wear after Labor Day?  This holiday also marked a tradition for gentlemen to switch from a straw summertime hat to a felt hat. It just makes sense doesn't it?

    September 5, 2011

    Pasta Salad


    This is something I make a big batch of that will last us for almost two weeks. Pasta Salad is super easy to pack for lunches and it really carries us through the day. Every time I make this it varies a little bit. I use whatever vegetables are fresh or that I already have, then I choose a meat that sounds good with the combination, usually it's kielbasa, ham or salami. I always add cheese and frequently change up the flavor, mozzarella and feta are always great. Lately I've been adding Cheese Curds which are a Midwestern delicacy. As for dressing that always stays the same, it's delicious. When you cook the pasta add a little olive oil to the water and the water won't boil over. Some people think the olive oil will coat the pasta and the sauce won't stick but with pasta salad I don't think it matters. Check out the recipe below. Let me know if you try it out!


    Ingredients:

    7 tablespoons extra-virgin olive oil              
    4 tablespoons fresh lemon juice                 
    3 tablespoons whole grain mustard          
    2 garlic cloves, minced                  
    1 1/2 cups feta cheese (garlic cheese curds are excellent, or any other favorite cheese)           
    2 teaspoons grated lemon peel                   
    1 cup chopped green onion
    1 1/2 cups bell peppers
    2 cups halved cherry tomatoes
    1 cup halved olives
    1 package of kielbasa sliced (salami, ham and shredded chicken are yummy too)
    1 box  penne pasta (I usually use whole wheat)

    Directions:

    To make the dressing whisk oil, lemon juice, mustard, garlic, and lemon peel in small bowl. Season dressing with salt and pepper.
    Cook pasta in large pot of boiling salted water until tender but still firm to bite. I usually add a little olive oil to the water so it doesn’t boil over.  Drain. Rinse pasta with cold water to cool quickly and drain again. Transfer pasta to large bowl. Add tomatoes, bell peppers, cheese, green onions, olives and meat. Pour dressing over and toss to coat. Season to taste with salt and pepper.


    nuggets
    Click the picture to learn more
     about cheese curds.

    September 3, 2011

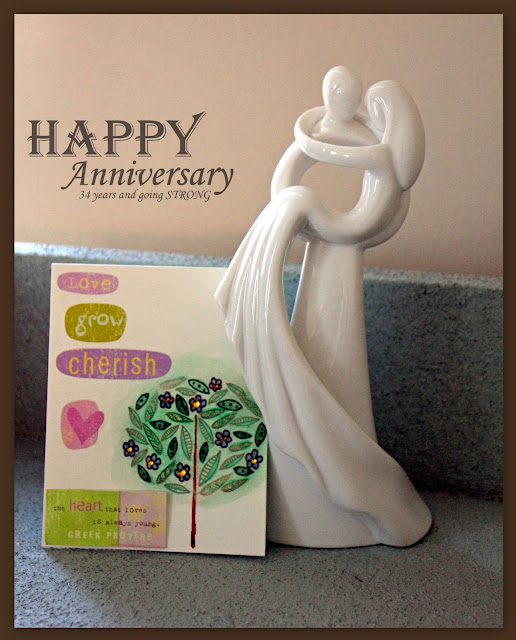
    Happy Anniversary to my Parents

    I feel so blessed that my parents are celebrating there 34th year of marriage today! Yesterday when I was talking on the phone to my mom she began to cry when thinking about her marriage. She said that he is more than a husband and a father that he is her very BEST friend. I guess that's the key to sustaining a successful marriage, the foundation of friendship. Do you have any good advice to share for a successful marriage?


    September 2, 2011

    Banana Bread

    What's my secret to deliciously moist Banana Bread? Yogurt. This time I used honey flavored Greek yogurt because that's what I had available. But in the past I've jazzed up the banana bread with PiƱa Colada flavored yogurt. Really you could use any kind of yogurt. Whats your favorite flavor?


    Banana Bread (click here for printable recipe)


    Ingredients:

    1 cup mashed bananas
    1 cup yogurt (I used honey flavored Greek yogurt)
    1/4 cup butter or margarine
    1 1/3 cups brown sugar
    2 eggs
    1 teaspoon vanilla
    2 cups all-purpose flour
    1 teaspoon baking soda
    1 teaspoon baking powder
    1/4 teaspoon salt

    Directions:

    1.) Preheat  oven to 350 degrees. Grease one loaf pan.

    2.) Combine banana and yogurt. Set aside. In a large bowl, cream together the butter and sugar until smooth. Beat in the eggs one at a time, then stir in the vanilla and banana mixture. Combine the flour, baking soda, baking powder and salt; stir in to the banana mixture. Spread the batter evenly into the prepared pan.

    3.) Bake for 50 minutes or until a toothpick inserted into the center of the bread comes out clean.

    4.) Allow time for your bread to completely cool before taking it out of the pan.

    5.) ENJOY!


    September 1, 2011

    Tomatoes from a Friend

    The other day at the pottery studio I met a new friend who offered me some juicy, ready to be enjoyed, tomatoes. Of course I couldn't say no. I very rarely say no to free food especially fresh from somebodies garden food. As the clay spun around the wheel my head spun about those juicy tomatoes and what I should do with them. I wanted to just bite into one, the smell was so enticing, and throwing pottery works up quite the appetite. But I knew these were special tomatoes and they deserved to be treated special. I thought of a recent post I read about a Tomato Cobbler.  But I didn't think the tomatoes I had would work for that since they were so big and juicy. That's when I decided to make me a Tomato Pie. I figured that other pies have juicy fillings so this might work a little better. And it did. That pie was divine! Those tomatoes made an absolutely wonderful pie filling.


    Here's the Recipe that inspired my Tomato Pie (click here for printable recipe)

    Ingredients
    • 4 tomatoes, peeled and sliced
    • 10 fresh basil leaves, chopped (I used some fresh Thyme too)
    • 1/2 cup chopped green onion (I used a white onion, since that's what I had)
    • 1 (9-inch) prebaked deep dish pie shell  (I whipped up my own homemade crust, the recipe is here)
    • 1 cup grated mozzarella
    • 1 cup grated cheddar
    • 1 cup mayonnaise (o YEAH!!! don't leave this out)
    • Salt and pepper
    Directions

    Preheat oven to 350 degrees
    Place the tomatoes in a colander in the sink in 1 layer. Sprinkle with salt and allow to drain for 10 minutes.

    
    This is an important step, don't forget it.

    Layer the tomato slices, basil, and onion in pie shell. Season with salt and pepper. Combine the grated cheeses and mayonnaise together. Spread mixture on top of the tomatoes and bake for 30 minutes or until lightly browned. To serve, cut into slices and serve warm.

    Pin It