August 31, 2011

Pizza

What's your favorite kind of pizza? At my house we usually make pizza once a week. The dough is simple to make and it can be frozen. If you decide to make the dough and freeze it you just need to plan to pull it out with plenty of time for it to thaw and rise again.


Here's what you need to make Pizza Dough (click here for printable recipe)


1 package active dry yeast
1 1/2 teaspoons sugar
3-4 cups flour
1 cup warm water
2 Tablespoons olive oil
1 teaspoon salt

Directions:

1.) Don't be afraid of yeast it's no big deal. Just turn your faucet on to warm and let it heat up for a minute. Then get one cup of water and mix in the yeast until it's dissolved. Add the sugar to the yeast water and you should start to see some bubbles form. That's a good thing!


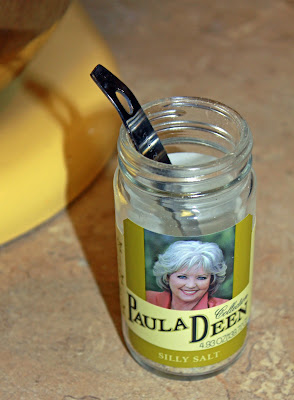
2.) Let the yeast hang out and bubble for a few minutes and in a separate bowl mix 2 cups of flour, salt and oil. This is a great time to add  herbs to the dough or any other seasoning you like. I sometimes use garlic powder and lately instead of regular salt I've been using Paula Deen's Silly Salt.


3.) Add the yeast mixture and beat until smooth. Stir in additional flour 1/2 cup at a time until the dough begins to form a ball and is easy to handle. Knead dough until it's smooth and elastic. I usually do all this with my KitchenAid. I know the dough is ready because the sides of the bowl are pretty much clean.


4.) Place the dough in a greased bowl or if you used a KitchenAid just drizzle a little olive oil all over the dough and turn it over to coat. Cover the bowl with plastic wrap and a kitchen towel and let it rise in a warm spot until it's doubled in size. This can take up to an hour. I'll often turn my oven on and get it good and hot then turn it off and open the door so that the environment is warm and I let the dough rise on top of the oven.

5.) Preheat oven to 450 degrees and prepare your pizza stone by sprinkling it with cornmeal. If you don't have a pizza stone you need one! It really makes a difference in the crust. I don't preheat the stone but I know a lot of people do recommend it.


Whatever you do DON'T forget this step! If you forget the cornmeal you will have
 quite a time getting the pizza off the stone.

6.) Punch down your dough and roll it into a circle. Carefully place it onto the pizza stone. You can let it sit to rise a little more before you add toppings but at this point I usually can't wait any longer.

7.) Bake with toppings at 450 degrees for about 25 minutes or until crust is golden brown.


Wonder what we had on our pizza this week?
 Along with the usual tomato sauce and mozzarella we also added:
 steak, bacon, carmalized onions, mushrooms, and blue cheese. YES it's DIVINE!
Pin It


August 30, 2011

Tidbit Tuesday (smile)

Tidbit #2
There are 656 muscles in the human body and it only takes 17 of them to smile. It is two and a half times easier to smile than to frown! When you frown you have to use 43 muscles!

August 29, 2011

Lauritzen Gardens

I recently took a day to explore the botanical gardens in Omaha. It's not exactly peak season for flowers right now. But this garden had an amazing display of outdoor ceramic sculptures made by Jun Kaneko.  It was a day filled with inspiration! The contrast between the sculptures and the natural setting was breathtaking.

The Lauritzen Gardens  is also well known for it's Model Railroad Garden. The model trains continuously travel through carefully crafted miniature communities, countrysides and landscapes which represent the Midwest.  The settings were made entirely from natural materials including: twigs, bark, berries, gourds, cinnamon sticks and pine cones. I spent quite a while in awe of this whimsical place. It draws the imagination out of both the young and the old. By far this is one of the favorite attractions of the Lauritzen Gardens.

I'm sure that you have some type of public garden near you that you can visit if you haven't already. They are wonderful places that often have much more to enjoy than just the flowers. I hope that you will be inspired to get out and enjoy such a place! Below you can see some of the pictures I took from my day at Lauritzen Gardens. Let me know which one is your favorite!


August 26, 2011

Chewy Chocolate Chip Butterscotch Cookies


The cookie jar in my house is rarely empty. I enjoy baking all kinds of cookies and my husband enjoys eating them all. There is one cookie I make that seems to be his favorite though and it's the one I'm sharing today.

When we didn't have cable TV out of the few channels we got my favorite to watch was PBS. There was a show that came on that I really enjoyed I think it was called Cooks Country. Have you ever seen it? Its a show that tests recipes, ingredients, and kitchen tools to find the very best. One day I caught a cookie episode and that was the first time I'd ever seen a cookie recipe that used melted butter. I was surprised because with my previous cookie making experiences I was always worried about having butter that was just right and not too soft.

From that show I also learned which chocolate chip stood out among the panel of tasters and was considered the best. Since then I've only used the Ghiradelli 60% bittersweet chocolate chips. They really are good and worth it even if they are a little more expensive. They are bigger and spread wonderfully throughout the cookie.


I found a similar recipe on All Recipes to the one that was featured on Cook's Country. I've had great results with this recipe! Using melted butter definitely seems to make the cookies chewier. See below for details on how I made these scrumptious chewy cookies.

All Recipes has an awesome ipad app!

Chewy Chocolate Chip Butterscotch Cookies
(Click the title for the recipe from All Recipes)

Ingredients:

2 cups all-purpose flour                            
1/2 teaspoon baking soda                         
1 Tablespoon vanilla extract
1/2 teaspoon salt                                           
1 egg
1 egg yolk
1 1/2 sticks of unsalted butter,  melted
1/2 cup white sugar
1 cup packed brown sugar                        
1 cup chocolate chips & 1 cup butterscotch chips

Directions:

1.) Preheat the oven to 375 degrees. Line two cookie sheets with parchment paper.

2.) In a medium bowl mix together flour, baking soda and salt. The original recipes calls for sifting these ingredients together but I never do that for cookies.


3.) Cream together the melted butter, brown sugar and white sugar until smooth and well blended. Next beat in the vanilla, egg, and egg yolk until the batter is light and creamy.


4.) Stir in the flour mixture a little at a time and mix by hand until just blended.  Then stir in chocolate and butterscotch chips.


5.) Drop cookie dough onto the prepared cookie sheets placing about 3 inches apart. I use a small scoop for this. It makes the process a lot easier and then nobody can complain that somebody else got a bigger cookie.


The OXO cookie scoop is a great kitchen tool and can be found HERE.


6.) Bake for 15 to 17 minutes or until the edges are lightly brown. I never go over 15 minutes but every oven and climate is different. Only place one sheet of cookies in the oven at a time. Allow the cookies to cool on the baking sheet for a few minutes and then transfer them to wire racks to completely cool.


You know you want one.

August 25, 2011

Roasted Carrots

It has always amazed me that when I fix roasted carrots that there are never any leftovers.  I've even prepared them for people who claim not to like carrots but they've loved these. You can roast any vegetable using the same method.  If you've never roasted your vegetables before you've got to try it!  It will be your favorite way to eat them.


The ingredients I use when I make Roasted Carrots are:
  • 1 large bag of carrots
  • Olive oil
  • House seasoning
*I use house seasoning on many things. It's a mixture of salt, black pepper and garlic powder. I make a big batch of it and what doesn't fit in the small container I store in a Ziploc bag. To get the recipe click here.

Directions:

1.) Preheat your oven to 400 degrees.

2.) Cut your carrots into similar size pieces.

3.) Add them to an iron skillet or any pan that can be put in the oven. I like to use my iron skillet because it has flavor that's been built up over time which makes the carrots more flavorful.


4.) Coat the carrots with olive oil, 3 Tablespoons should work. Then sprinkle about 1 Teaspoon of house seasoning over the carrots and toss.


5.) Roast in the oven for about 30 minutes, stirring them occasionally. You want the carrots to be brown and tender.


You can do the same thing with any vegetable. I crave roasted broccoli and cauliflower. You can also change up the seasonings or add fresh herbs. I hope next time you want to fix some veggies you'll try roasting them!

August 24, 2011

Glazed Kielbasa

We make this dish pretty often in our house because its easy, delicious and cheap. It makes me feel like quite a fancy cook too but it's really quite simple. I would love to hear if you try it and what you think!


Glazed Kielbasa (Click the title to get the printable recipe)


Ingredients:
  • 1 package cooked Kielbasa  (make sure you get plain Kielbasa, its too much flavor with anything else)
  • 1/2 cup dry white wine
  • 1/4 cup mustard
  • 3 Tablespoons brown sugar
  • 2 Tablespoons fresh parsley
  • Cracked black pepper to taste

Directions:

1.) Bring wine to a boil in a large pot.


2.) Cut Kielbasa into 1 inch pieces and add to the wine. Reduce temperature to medium-low and cook 10 to 12 minutes until Kielbasa is heated through.

3.) Add mustard and brown sugar. Mix well. Bring back up to boil, stirring occasionally. Reduce heat to medium-low and cook uncovered about 10 minutes or until sauce is thickened and Kielbasa is well glazed. Stirring frequently.


4.) Before serving stir in parsley and pepper.


Tips:
  • Don't stress out if your sauce isn't thick enough! Serve it up with some couscous or rice on the side and let that absorb some of the glaze.
  • Taste, Taste, Taste. Always taste your food as you cook it. Maybe you want a little more mustard flavor or more pepper.
  • Don't freak out if you don't have fresh parsley just use dried parsley. You could always try another herb like cilantro or a little basil too.
  • You might want to double the recipe. That's what I usually have to do. My husband really likes this stuff and when I double it we can enjoy it again the next day for either lunch or dinner.
Next time I'll share the roasted carrots that I served along side the Kielbasa.


August 23, 2011

Tidbit Tuesday (eyebrows)

Today will start a new tradition for my blog, that is if I can keep up with it. I regularly share random "fun" facts with those around me. Often I can't remember where these random facts come from or what sparks me to share them in the first place. I guess I'm kinda like a sponge. I absorb stuff from all over the place and when I start to get full I let a little out.

Maybe by releasing some of these random facts, or as I like to call them Tidbits, the awkward situations I create by blurting out a fact that has nothing to do with the conversation will decrease. My husband can only hope for such a thing to happen.


Tidbit #1
 Have you ever noticed that the famous Mona Lisa was painted with no eyebrows? Do you know why? That's because in Florence, Italy during the Renaissance it was the fashion for women to shave them off.

And you thought women do crazy things for beauty these days...


I had the privilege of viewing the Mona Lisa in person. This was the best picture I could get.
 I've never seen such a large crowd of people around a painting before!


August 22, 2011

Life is...

Today I heard a great quote that I wanted to share.


What is life to you? What would you write in place of the ...?

August 21, 2011

Shopping for curtains? Look no further than the bath department


I've lived in quite a few places in my young life. So far they've all been rental properties. When it comes to renting we don't really want to invest a whole lot in the appearance. We're saving for the day when we own a  home and can really personalize it.  In the past we've been blessed with pretty decent window treatments already installed and neighbors that weren't regularly walking by our windows. Unfortunately that's not the case this time. The first thing I said when I walked in the door of our new place was that we needed something to go over our blinds to provide more privacy.

I'd never shopped for window treatments before so boy was I in for a rude awakening.  I couldn't believe how expensive they were! I found some that were on sale and I was jazzed until I found out it only included one tiny panel. I did consider making my own but I didn't want to wait for that. That's when I spotted some beautiful shower curtains that looked like a piece of art to me. Shower curtains come in so many different patterns, colors and fabrics. The best part is shower curtains are way cheaper!

I decided on two that I really liked both of which were under $20 and I had coupons on top of that. Shower curtains come in a variety of patterns, color schemes and textures. One shower curtain would work perfectly for the small windows in our place. You could also use them as panels and get a couple for your windows. There are a ton of options out there for hanging the curtain from the rod. You don't just have to shop in the curtain department. Certain napkin rings will work and of course the fun shower rings they sell in the bath department, even book binding rings work great. Some shower curtains don't even need rings at all.

I think my window treatments turned out pretty good for having no prior experience in this area. I would love to hear what you think! Next time you consider window treatments you might want to look in the bath department first.


It's easy to sweep the curtain over to the side when you want to let more light in.